Application Instructions For Cats

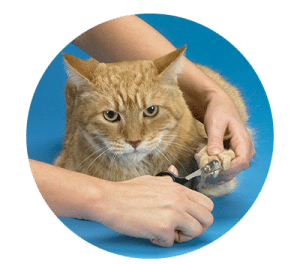
Step 1 – Trim the pets nails
Note: If you do not regularly trim the pet’s nails or if the pet is not accustomed to having its paws handled, it may be reluctant to let you do so at first. This is natural and may be overcome easily by taking 5- 10 minutes daily for several days to gently massage your pet’s paws with your fingers. It is also helpful for someone to restrain the pet to allow both your hands to work.
For best results, make sure the pet’s nails are free from dust or grit before you begin. If necessary clean with a cotton swab moistened with alcohol. With a pair of pet nails clippers, trim only the narrow tip of the pet’s nails.
Step 2 – Apply adhesive to caps
Select nail cap sizes that will cover the entire nail. Remove adhesive tube cap and cut off the tip. Some nail caps may be too long for some nails. These can be trimmed back from the open end with your nail trimmers for a custom fit. Attach the applicator to tip. Insert the nozzle completely into nail cap and fill 1/3 of the cap with the adhesive – do not overfill. Before beginning application use applicator tip to fill all 10 nail caps 1/3 full with adhesive.


Step 3 – Apply caps to nails
Extend cats nail by grasping paw between thumb and forefinger and gently push nail forward from the top until fully exposed. Slide cap fully onto nail. After all caps are applied , observe cat for at least five minutes to make sure the nail caps are secure and the cat does not attempt to remove them.
Step 4 – Nail cap training
Nail caps may fall off during the initial training phase. Pets may attempt to chew the nail caps until they adjust to them. This is normal training behaviour. Replace nail caps as necessary.
Cats will usually shed their nails every 4 – 8 weeks. Trim nails and replace nail caps as necessary. There are medical exceptions where the nails do not properly shed. This condition requires the nails to be trimmed every 8 weeks to avoid overgrown nails.

Application Instructions For Dogs

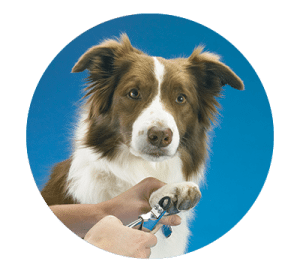
Step 1 – Trim the nail tip
For best results, make sure the pet’s nails are free from dust or grit before you begin. If necessary clean with a cotton swab moistened with alcohol. With a pair of pet nails clippers, trim only the narrow tip of the pet’s nails.
Caution: trimming the nail too short reduces the surface are required for proper adhesion and may cause slight bleeding. If the nail bleeds, wait until the bleeding stops before applying nail cap- Do not apply the nail cap to a bleeding nail. Soft paws will help protect a sensitive nail from further irritation.
Step 2 – Fill nail caps with adhesive
Fill nail caps 1/3 full with adhesive. Give the nail cap a gentle squeeze to distribute the glue evenly and release any air bubbles. If glue oozes out of the nail cap, you have inserted too much adhesive. Remove some of the glue by squeezing it out onto a paper towel.


Step 3 – Fit nail caps
Slide nail caps onto nail. The nail cap should not touch the dog’s nail cuticle. If it the cap is too large, trim the open end of the nail cap to create a better fit.
Step 4 – Nail cap training
Nail caps may fall off during the initial training phase. Pets may attempt to chew the nail caps until they adjust to them. This is normal training behaviour. Replace nail caps as necessary.
Soft paws can last up to 3 months for indoor dogs. Nail cap life will be shorter for outdoor dogs. Nail caps should always be replaced after 12 weeks.


